Workflow: Creating and Using Actions
While a Query asks a stateless question about the world (Is this true?), an Action performs a complex, stateful process over time (Do this thing).
Actions are reusable, asynchronous Blueprint objects that encapsulate gameplay logic that isn't instantaneous. Think of them as "mini-state machines" for specific tasks.
- Examples of Actions:
- Reloading a weapon (lasts 3 seconds, can be interrupted).
- Hacking a terminal (requires a series of steps or a timer).
- Channeling a spell (stays active until a button is released or the player is hit).
Why Use an Action?
- Asynchronicity: Actions are latent. You fire an
Activatepin, and the main Blueprint execution continues immediately via theThenpin. The Action will notify you later via itsOnSuccessorOnFailureoutput pins when its job is done. - Encapsulation: All the complex logic for a task (timers, listening for other events, multi-step checks) lives inside its own self-contained Blueprint, keeping your main Event Graph clean and readable.
- Reusability: You can create a generic Action like
BPA_ApplyEffectOverTimeand use it in dozens of different places without ever duplicating logic. - Cancellation: Actions can be cancelled. If a player starts reloading but then decides to sprint, you can get a reference to the reloading Action and cancel it mid-process.
Actions are the ultimate tool for decoupling complex behavior from its trigger.
Step 1: Create the Action Blueprint
Let's create a simple Action that simulates a "hack" that takes 2 seconds to complete.
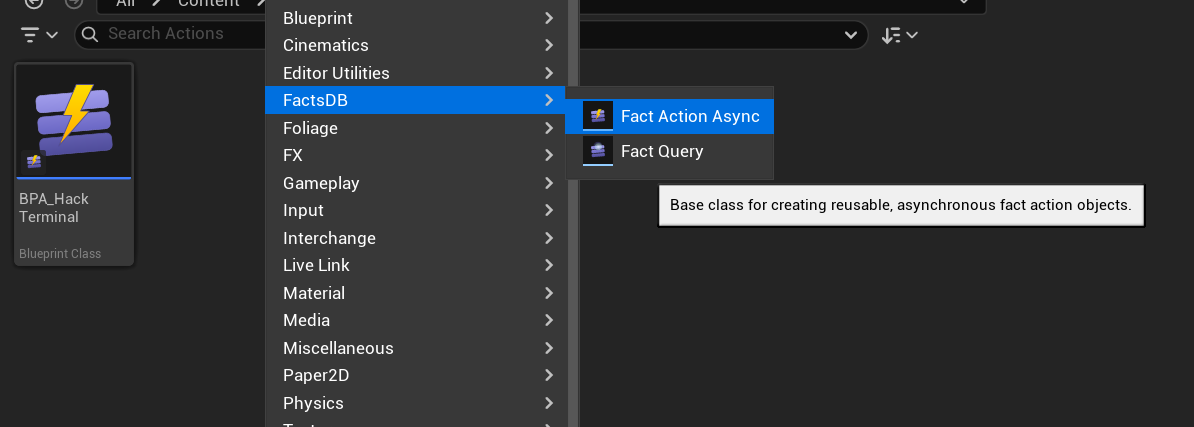
- In the Content Browser, right-click and select
FactsDB. - Search for
Fact Action Async. Select it. - Name the new Blueprint, for example,
BPA_HackTerminal.
Step 2: Implement the Action Logic
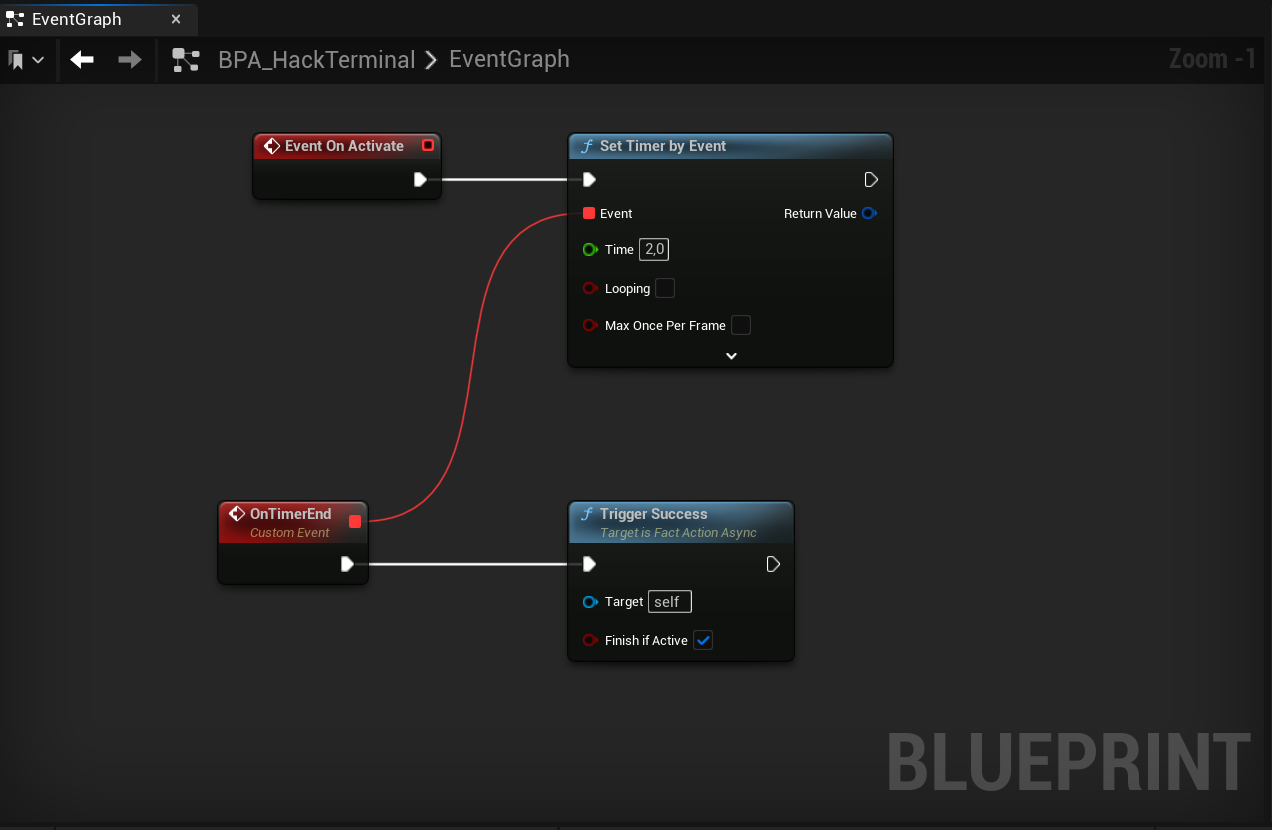
Open BPA_HackTerminal. You will see that the Event Graph already contains two events: On Activate and On Cancel.
On Activate: This is fired when the Action's node is executed in another Blueprint. This is the entry point for your logic.On Cancel: This is fired if the Action is cancelled externally. You should use this to clean up any timers or state.
Let's implement our 2-second hack:
- From the
Event On Activatenode, drag off the execution pin and add aSet Timer By Eventnode with aTimeof2.0seconds. - After the
Timercompletes, add aTrigger Successnode. This is a special function available only inside Action Blueprints that fires theOnSuccessoutput pin on the main node.
If the hack could be interrupted or fail, you could add logic that calls Trigger Failure instead. For this example, our simple timer is enough. Compile and save the Blueprint.
Step 3: Use the Action in Blueprints
The system automatically discovers your new Action and creates a factory node for it in the Blueprint context menu.
- Open any Blueprint (like your Player Character).
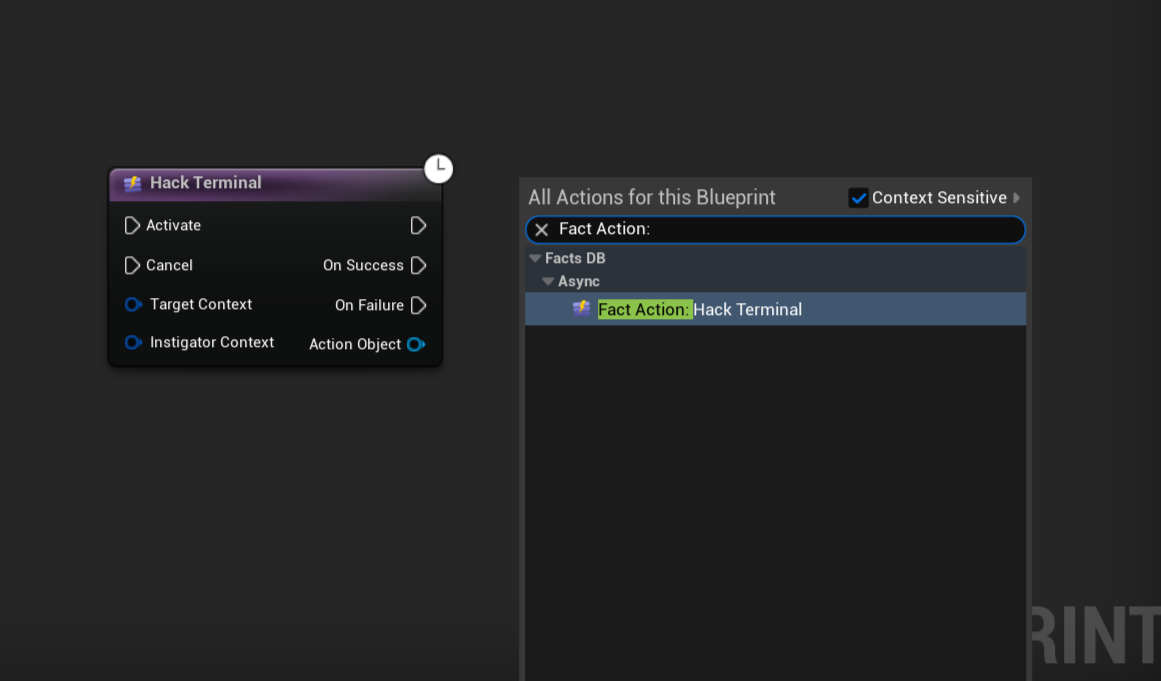
- Right-click in the Event Graph and search for "Fact Action". You will see a new entry:
Fact Action: Hack Terminal. Add this node to your graph. - This node is asynchronous and has several execution pins:
- Activate (Input): Run this execution pin to create and start the Action.
- Cancel (Input): Run this pin to stop an active Action. You'll need to connect the
Action Objectoutput pin to this. - Then (Output): Fires immediately after the Action has been created and started.
- On Success (Output): Fires only when the Action inside calls
Trigger Success(in our case, after 2 seconds). - On Failure (Output): Fires only when the Action inside calls
Trigger Failure.
Connect the On Success and On Failure pins to the logic you want to execute when the hack is complete.
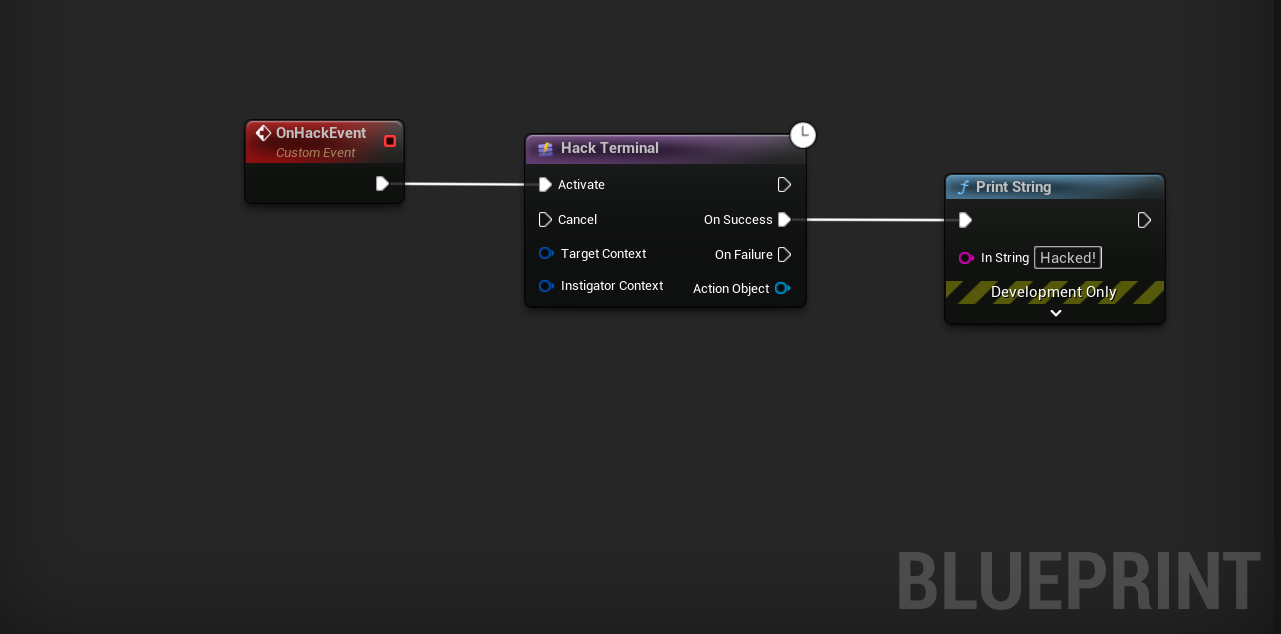
The Action Object output pin provides a reference to the live Action instance. You can save this to a variable. If you need to stop the action early (e.g., the player moves away from the terminal), you can get the variable and connect it to the Action Object input on a separate Cancel call for the same node type.
That's it! You have successfully encapsulated a 2-second latent operation into a single, clean, and reusable node. If you now need to change the hack duration or add a skill check, you only need to modify the BPA_HackTerminal Blueprint; every location that uses it will be updated automatically.
This concludes the basic workflow guide. You now have the fundamental skills to define, manage, and use data with FactsDB. The following sections will dive deeper into the more advanced features and C++ architecture.