Workflow: Using Facts in Actors
Once you have a defined and registered Schema, you can use it in any Actor by adding and configuring the UFactsComponent. This component acts as the runtime container for your data.
This guide assumes you have already created the Schema.Player as detailed in the previous section.
Step 1: Add the UFactsComponent
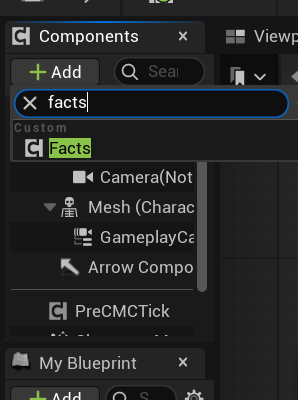
- Open the Blueprint for your player character (or any Actor you want to add facts to).
- In the Components panel, click the + Add button.
- Search for and select
FactsComponent.
Step 2: Configure the Component
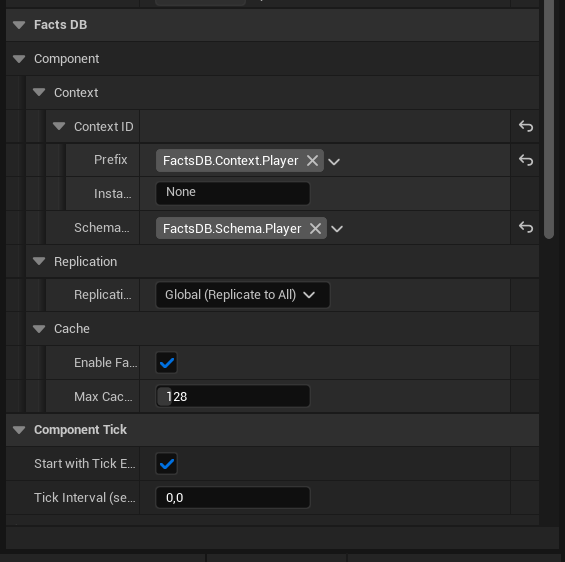
With the new FactsComponent selected, go to the Details panel to configure its two most important properties.
Schema Used
This property tells the component which data template to use.
- Click the dropdown next to Schema Used.
- Select the
Schema.Playertag we created earlier.
At this point, when the game starts, the component will automatically be populated with the Health, MaxHealth, and HasKey facts from our DT_PlayerFacts Data Table, initialized with their default values.
Context ID
This property gives our component's data a unique identity at runtime, allowing other systems to find and interact with it. A ContextID has two parts:
- Prefix: A
GameplayTagthat defines the type of context. - Instance Name: An
FNamethat uniquely identifies this specific instance.
You have two main options for setting the Context ID:
Option A: Dynamic, Unique ID (Recommended for most cases) This is ideal for objects that are spawned dynamically, like enemies or projectiles. The system will automatically generate a unique instance name at runtime.
- For the Prefix, select
Context.Player.- (You may need to create this tag in
Project Settings>Gameplay Tagsif you haven't already.)
- (You may need to create this tag in
- Leave the Instance Name set to
None.
When BeginPlay is called, the system will see the valid Prefix and the None Instance Name, and it will automatically generate a unique name (e.g., Player_0, Player_1, etc.), ensuring no two players have the same Context ID.
Option B: Static, Persistent ID This is useful for unique, placed-in-level actors or singletons (like a single player character in a single-player game) where you want a predictable, human-readable ID.
- For the Prefix, select
Context.Player. - For the Instance Name, type a specific name, for example,
DefaultPlayer.
Now, this specific instance can always be found using the exact combination of Context.Player and DefaultPlayer.
If you use static IDs, you are responsible for guaranteeing their uniqueness. Having two live components with the same static Context ID will cause errors, and only one will be registered with the system.
Step 3: Configure Replication (Optional)
In the Details panel, you can also find the Replication Type property. This determines how the component's ReplicatedFacts container behaves in a multiplayer game.
- Global (Default): The facts will be replicated to all clients. Best for data everyone needs, like another player's health.
- Owner Only: The facts will only be replicated to the client that owns this Actor. Best for data only the local player needs, like their specific ammo count.
- Local: The facts will not be replicated at all.
For our player example, Global is a good choice.
What Happens Next?
That's it! You have now set up an Actor to use FactsDB.
- When the game starts and
BeginPlayis called on this component, it will:- Initialize its internal data stores with the facts from
Schema.Player. - Register itself with the global
UFactRuntimeSubsystemusing its resolvedContext ID.
- Initialize its internal data stores with the facts from
- The component is now "live" and its facts are ready to be read and modified by other Blueprints and C++ systems.